Using Objective-C libraries in Swift
Swift and Objective-C in the Same Project
In this post I’m going to write how you can use Objective-c libraries in your Swift project.
Xcode projects can contain either language, you can use this feature called Mix and Match to implement the latest swift features in your existing Objective-C proyect, or use objective-c code in new swift apps.
For this example, I’m going to import ProgressHUD library, a lightweight and easy-to-use HUD for iOS. (Objective-C)
1. Clone or Download ProgressHUD from Github.

In Objective-C, there are .m and .h files. A .m file, is where methods are implemented, and the .h file is for public declarations of your class like an API.
2. Copy the .bundle, .h and .m files into your project and the next alert will appear.
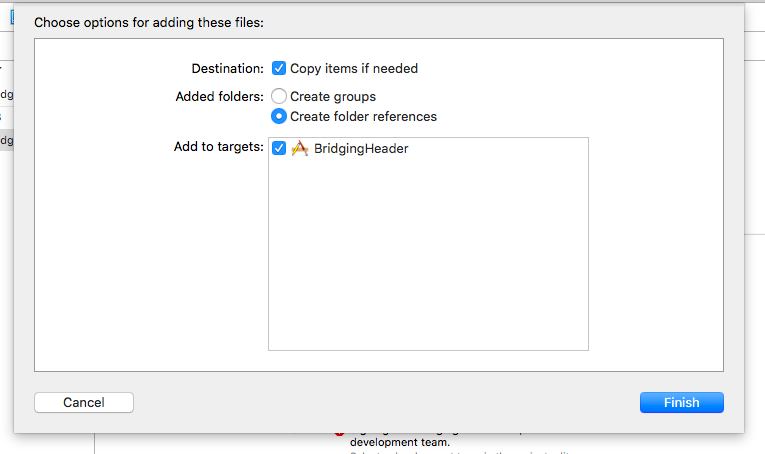
Check your project Target, and press Finish.
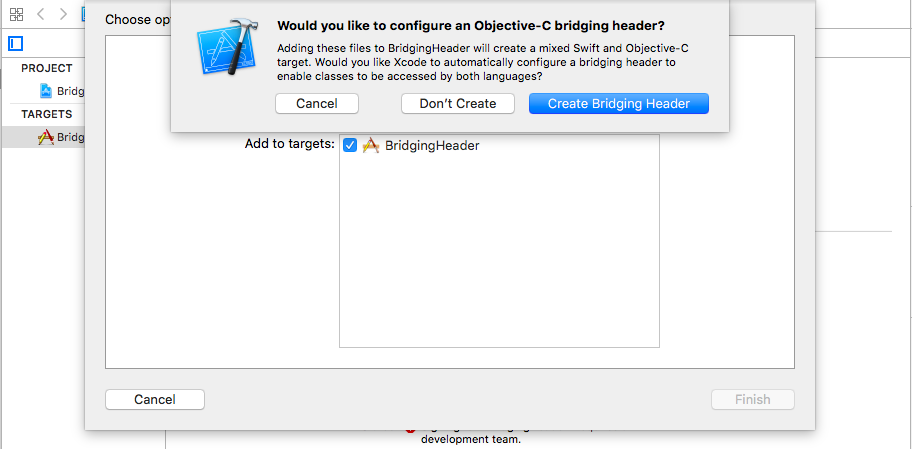
3. Xcode offers to configure a Bridging header, select option Create bridging header.
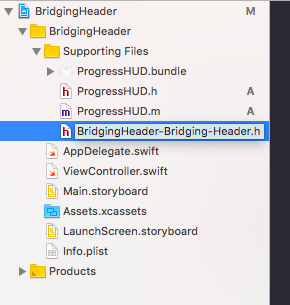
4. Now, you can see your Bridging header file in the Navigator
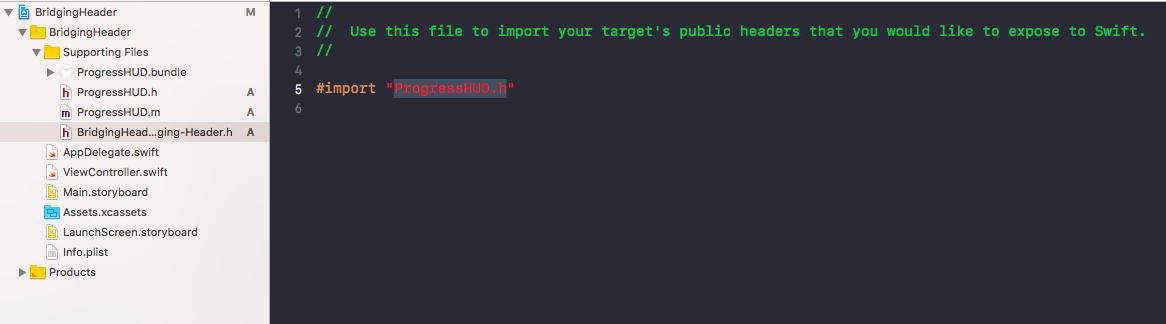
5. Click on your Bridging header to open, add all your headers files (.h) that you would like to expose to Swift. In my case, I’m going to import the ProgressHUD.h file.
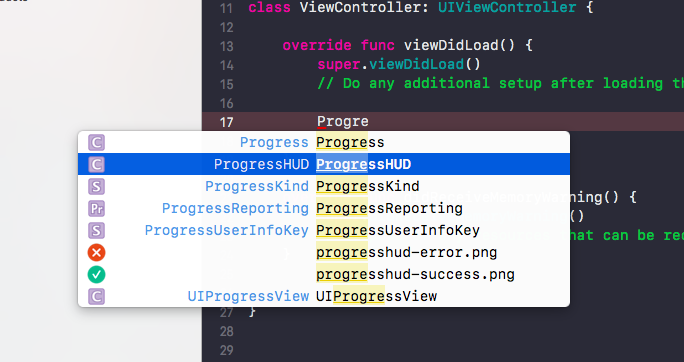
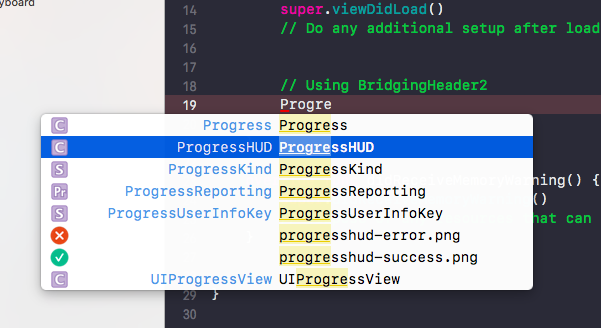
6. Build your project (cmd+B). Now you can use your Objective-C library in your Swift app.
If the option to create Bridging Header automatically has been denied, there’s still an option to create this file manually.
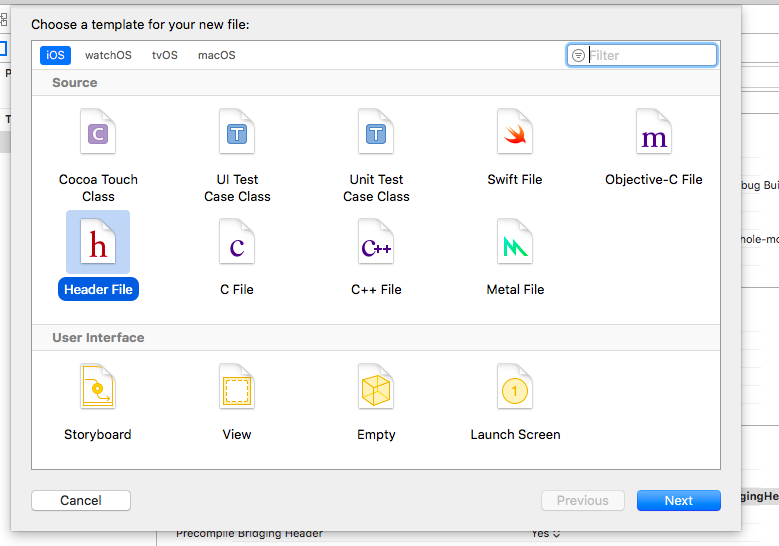
1. Create a new Header File

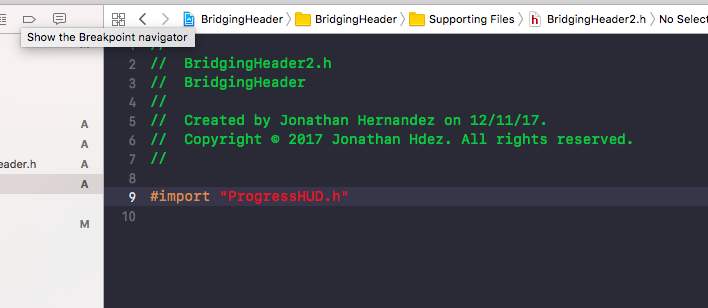
2. Click on your new Bridging header file to open, remove the default text and add all your headers files (.h) that you would like to expose to Swift.
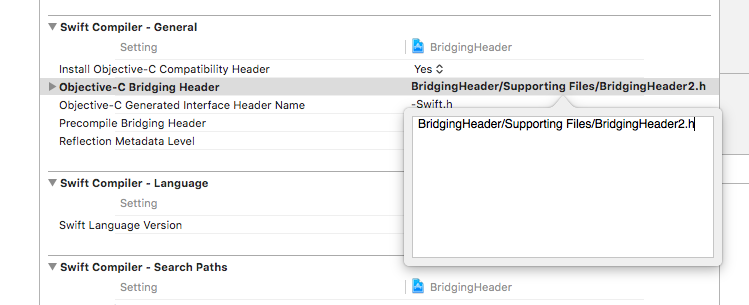
3. Now, you need to set the path to the new Bridging Header file in your project Build Settings.
To set the path to your Bridging Header file you need to navigate to your project Build Settings where look for Swift Compiler – General section.
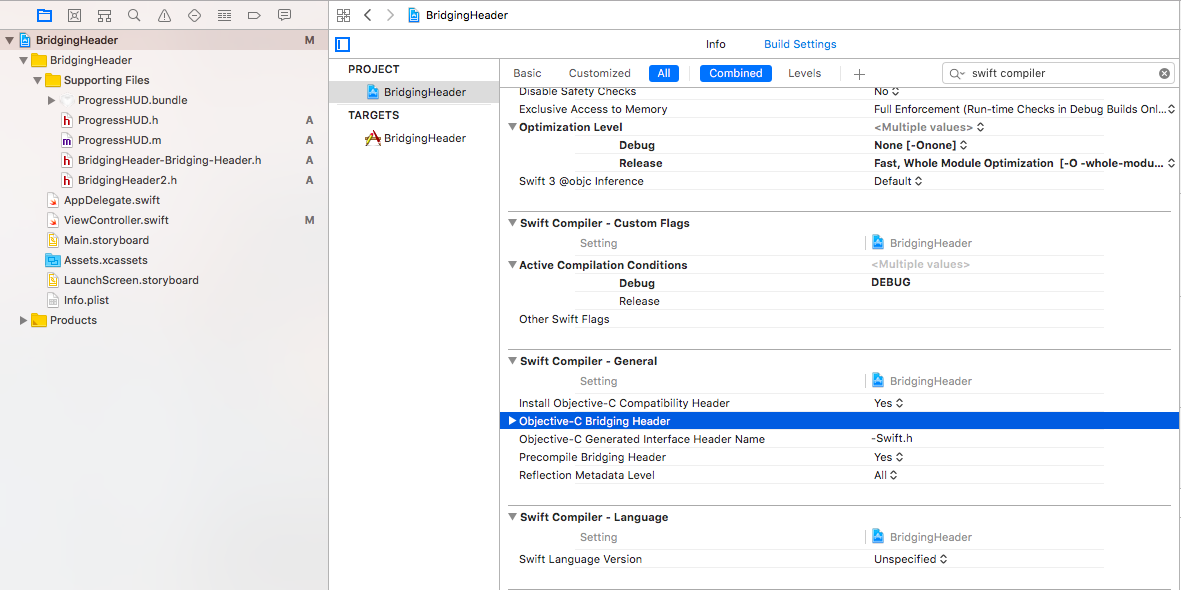
4. Double click on Objective-C Bridging Header option to open the Editor.
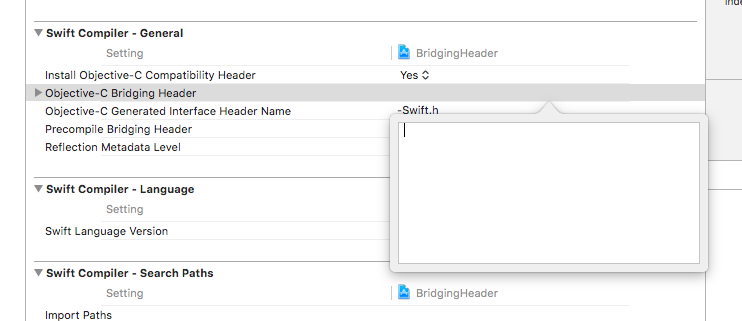
Set the path to your Bridging Header file.
5. Build your project (cmd+B). Now you can use the Objective-C classes in your Swift project.
If you want to directly play with the code, I have added the example code on Github repository.

Share this post
Twitter
Google+
Facebook
Reddit
LinkedIn
StumbleUpon
Pinterest
Email